Personal Home Lab
I needed to practice my networking skills, so I made my own home lab.
Why make a home lab?
Simply put, I wanted to put what I’d been learning in my networking and cybersecurity classes into practice. I figured the best way to get hands-on experience with managing and manipulating computers over a network was to build my own. Over the course of a few months, I dove into forums, reading up on the hardware and software people were using in their personal homelabs. I took notes, compared setups, and—with a student budget in mind—set out to build something both practical and affordable.
Hardware
Components:
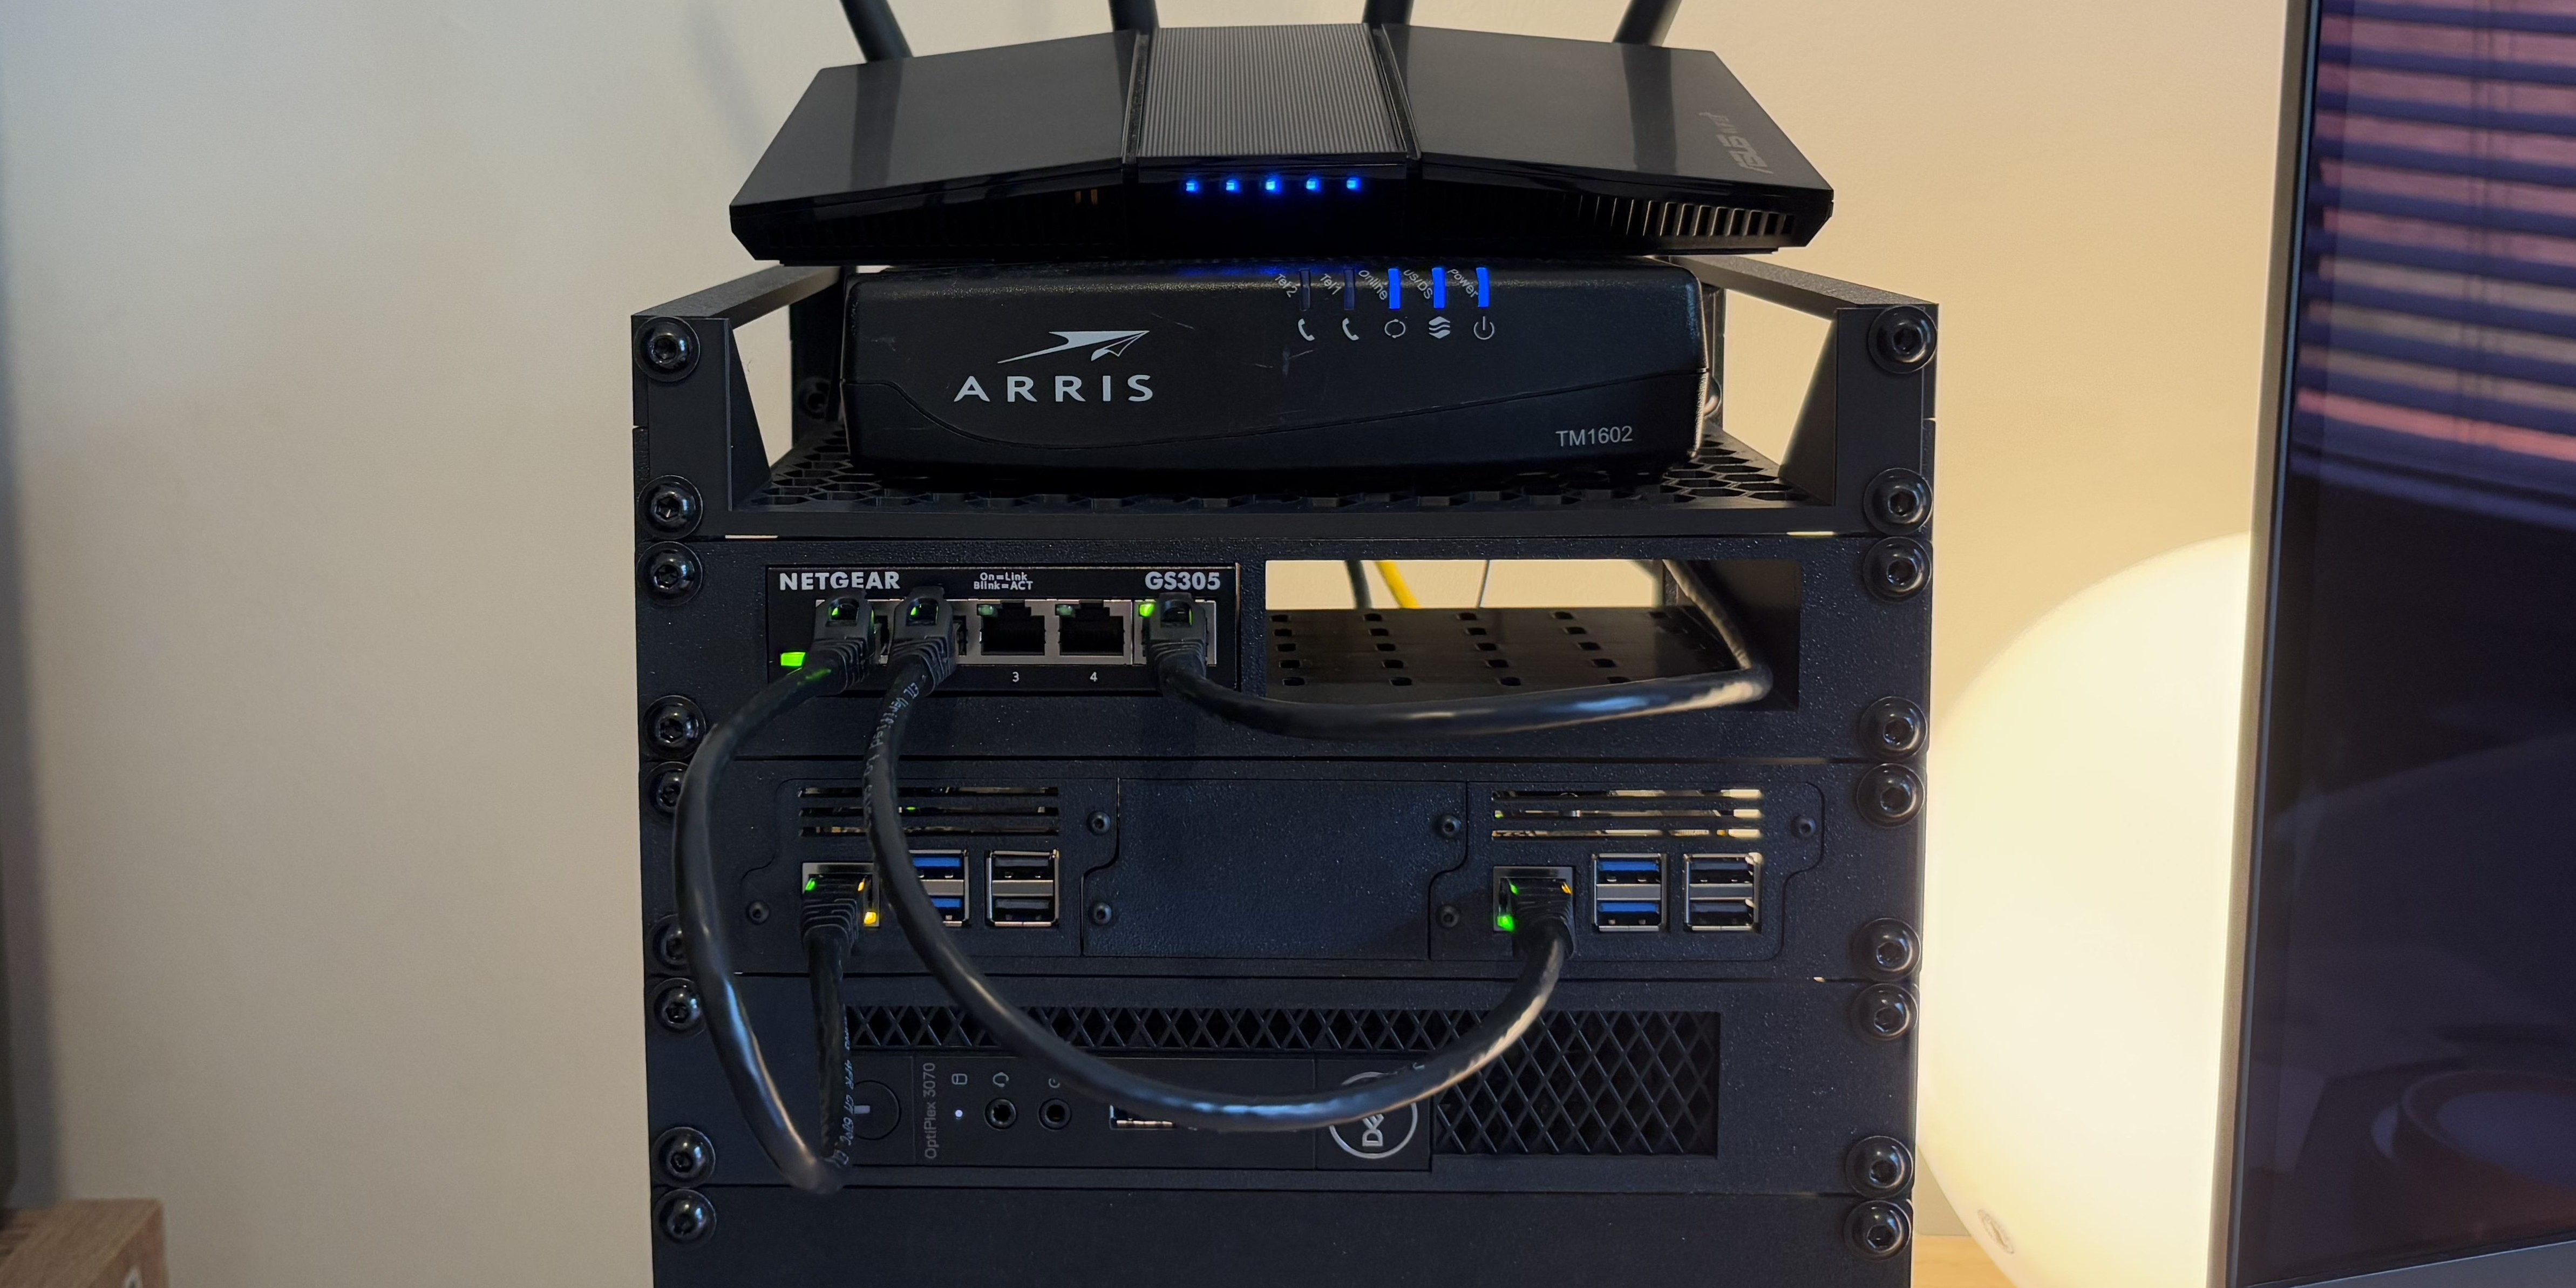
- Asus RT-AX1800S Router
- Netgear 5 Port Gigabit Switch
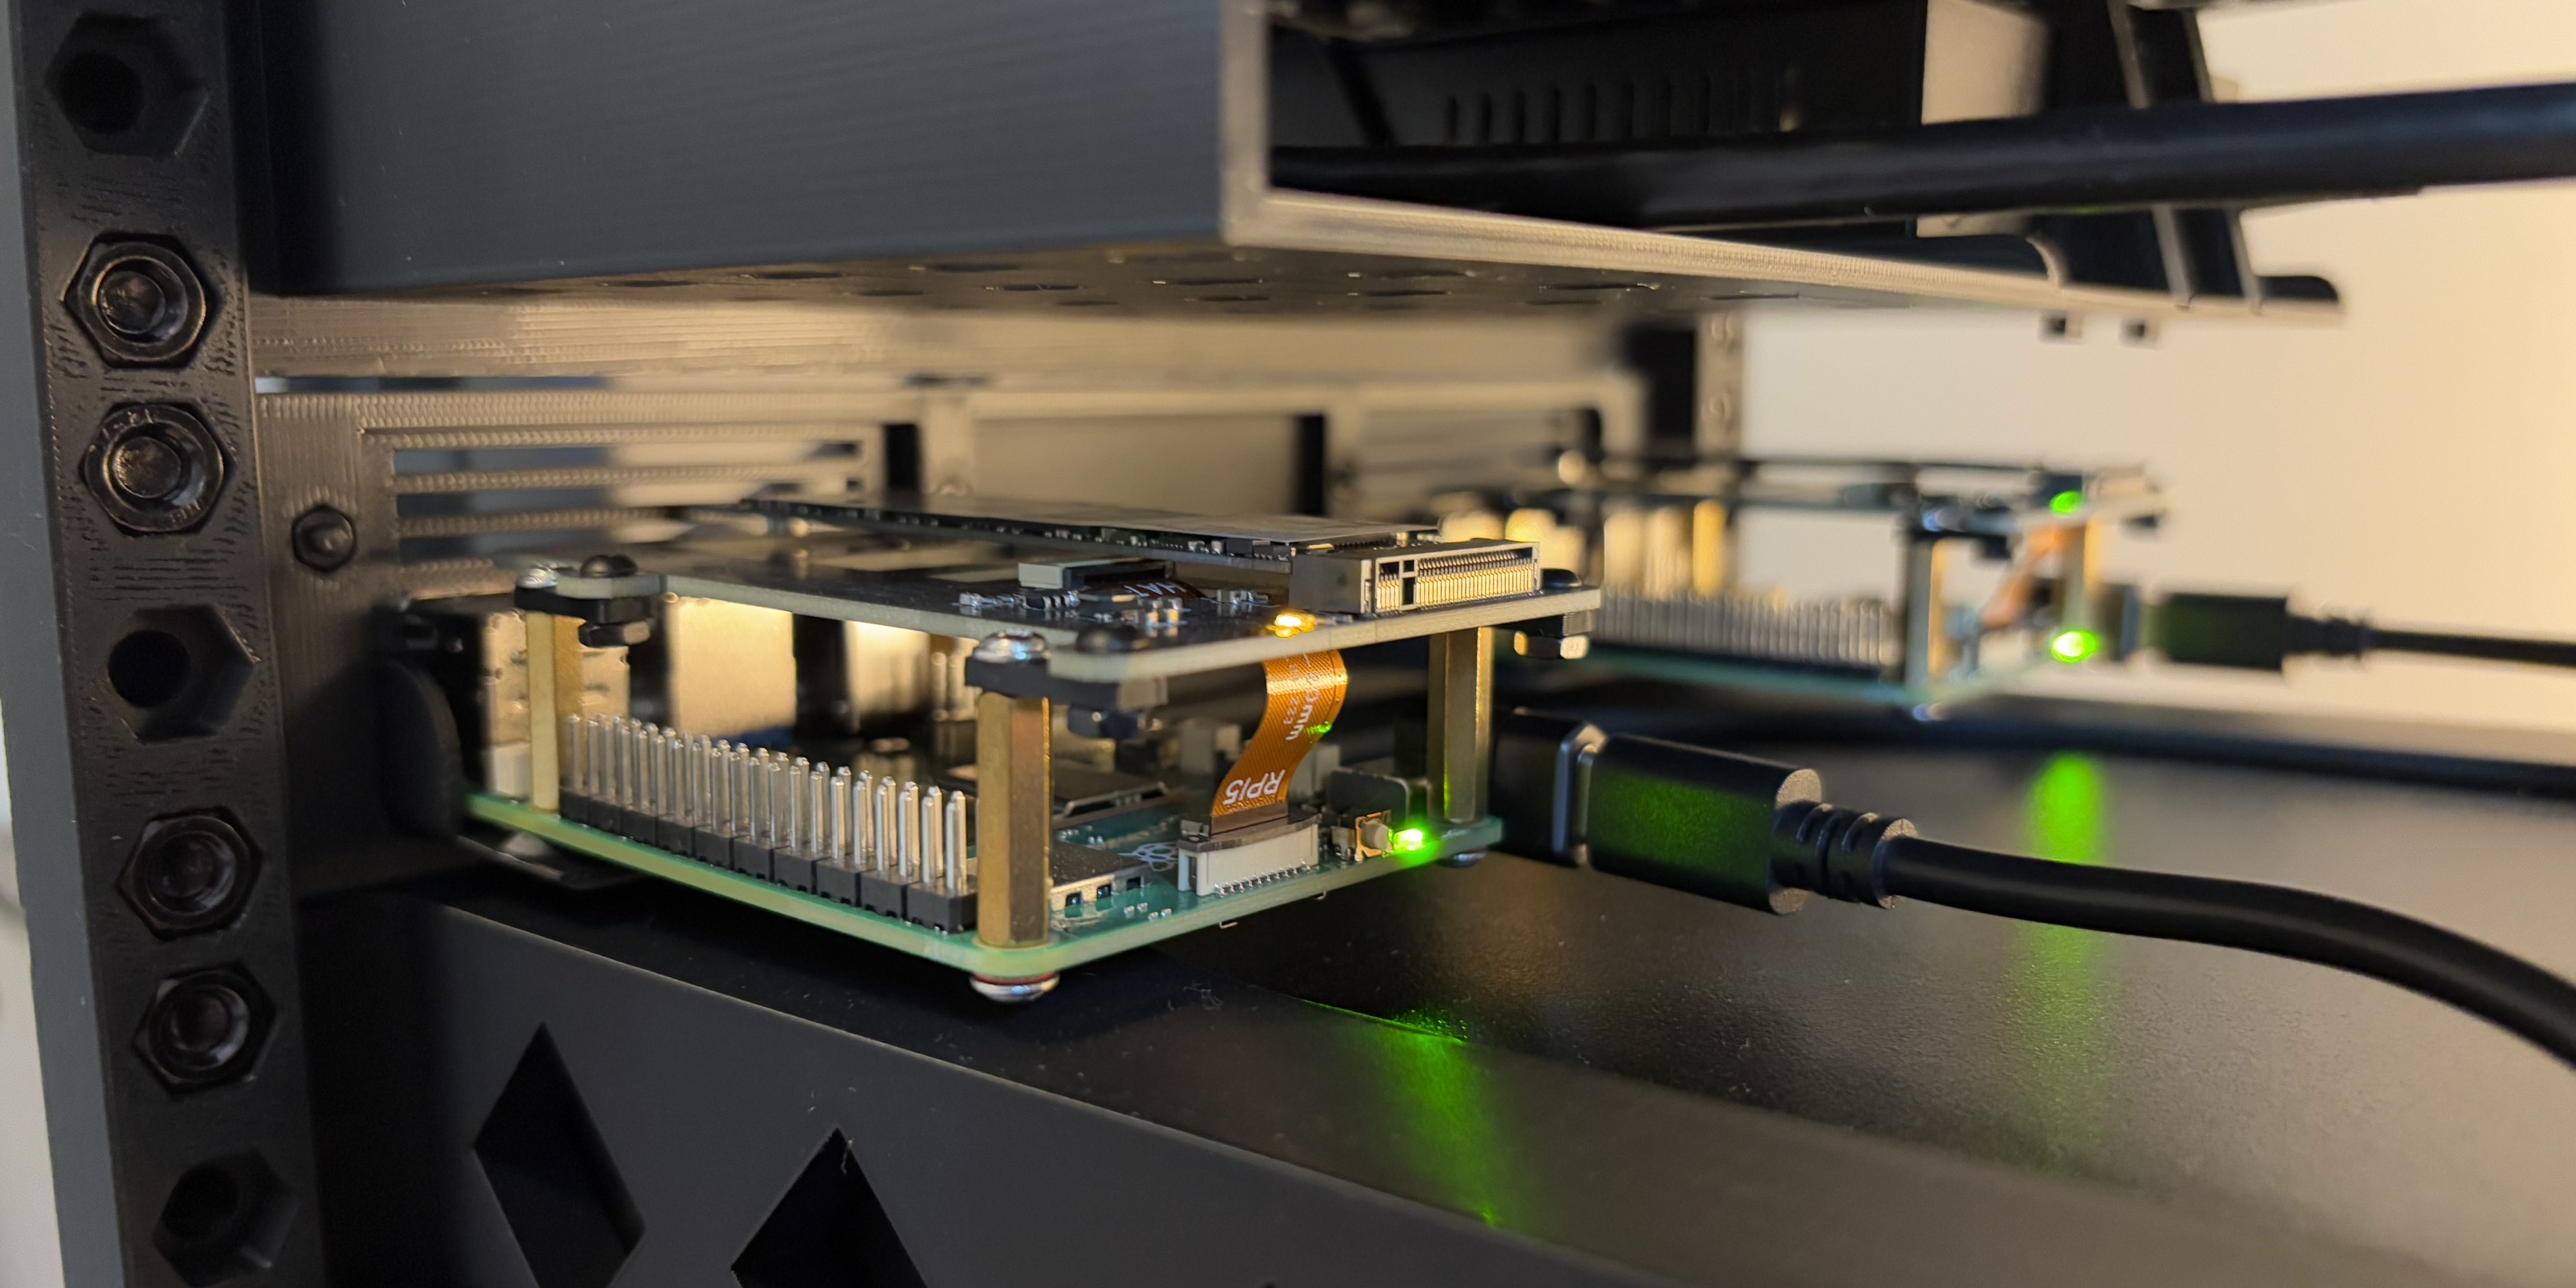
- 2x 4GB Ram Raspberry Pi 5 with NVMe hats and 256gb NVMe drives
- Dell Optiplex 3070 9100T 8
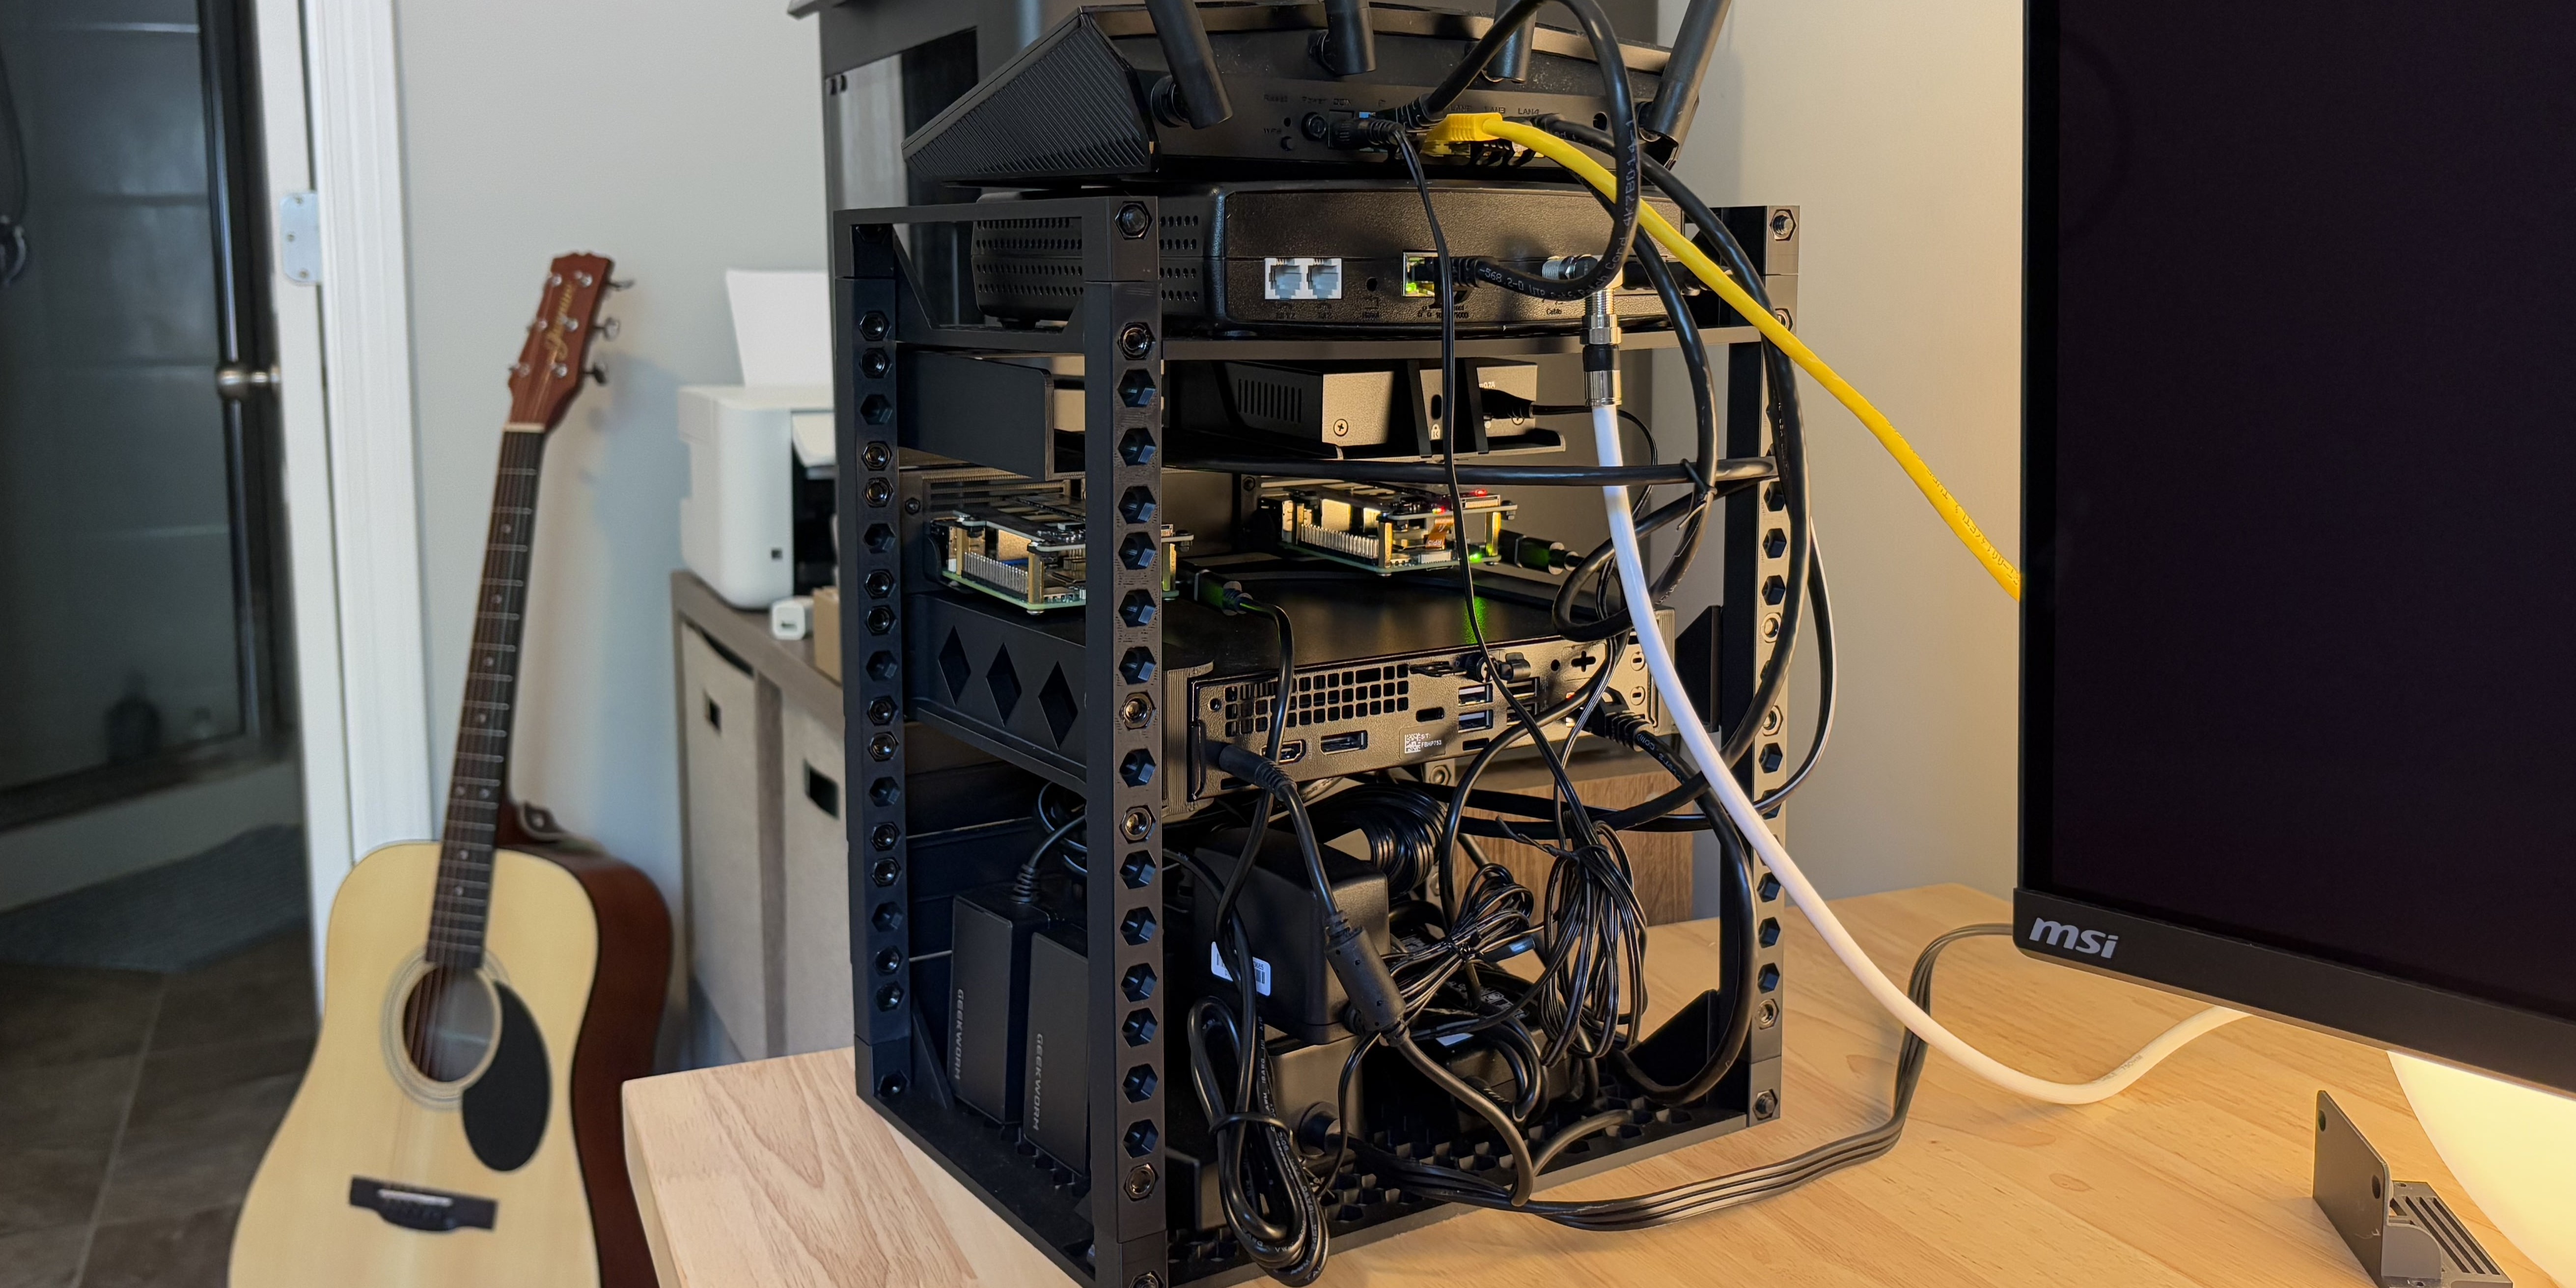
- 3D Printed Rack with Custom Mounts for Hardware
I started with the router—something I already had on hand. While its CPU is a bit slow and the RAM is limited, it hasn’t been a bottleneck yet, so it works for now. The gigabit switch was a hand-me-down from a friend who no longer needed it. It works, and it was free—an easy decision to include it in the setup.
As for the computers, I began with two Raspberry Pis. They’re perfect as low-power machines that can run processes or scripts 24/7 without making a noticeable impact on my electricity bill. Instead of relying on microSD cards for storage, I opted for NVMe drives to get faster, more reliable performance. I mounted NVMe boards to the Pis using 3D-printed custom brackets and standoffs, making sure they fit cleanly into my rack without interference.
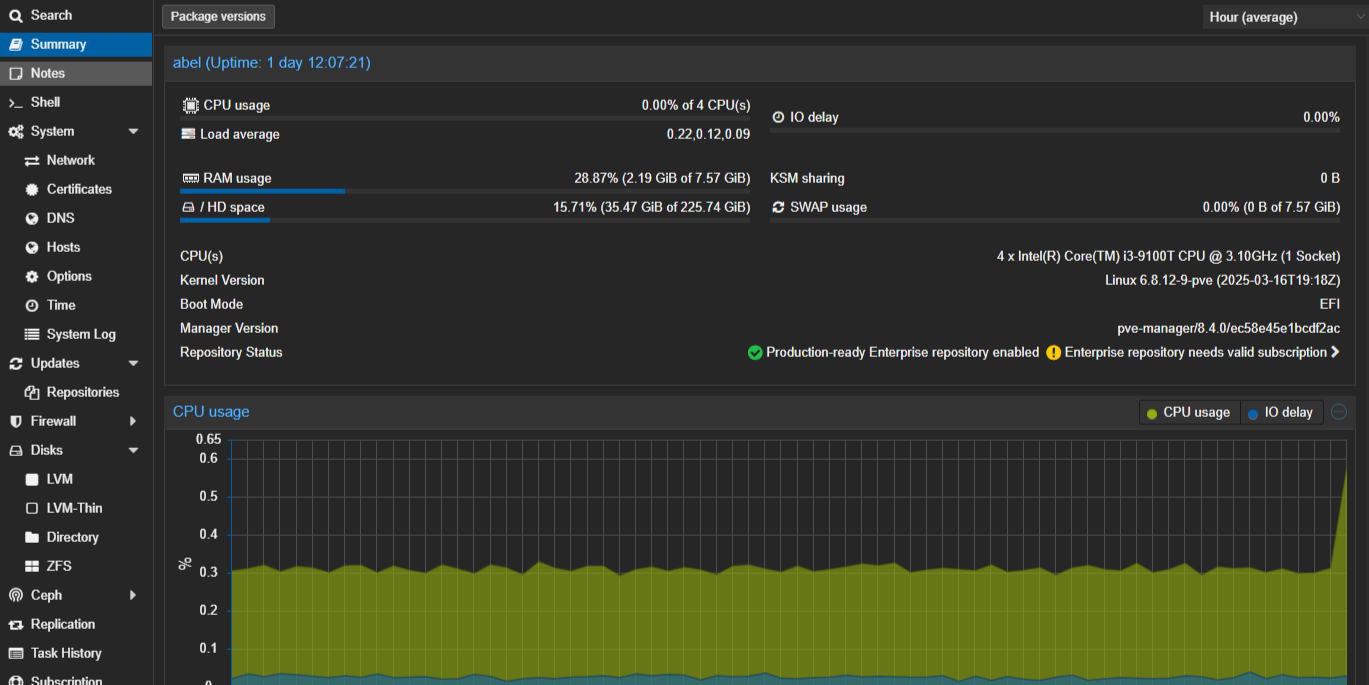
After getting comfortable with the Pis, I added a used Dell Optiplex 3070 Micro that I picked up on eBay. I set it up as a dedicated Proxmox machine to dive deeper into Linux environments and experiment with penetration testing tools using Kali Linux. More recently, I’ve also started working with containerization—something that Proxmox makes incredibly easy to set up and manage.